December 30, 2012

Handmade Christmas

I know you've heard this a million times and probably feel the same way but, YIKES!!! How has another year passed so quickly?!? 

Our Christmas was truly wonderful. It was a lot more slow paced and really felt Christ centered. We also had lots of time to relax and be with our families. Scott and I ended up making some gifts this year so I thought I would share them with you :)

First we have my father-in-law. He's the master meat carver over at his house and most of the time he's carving on Sundays right after church with his nice clothes on. So he wears my mother-in-law's apron :) I decided to buy him a manly apron but after looking around I realized I could just make him one! 


I used my mother-in-law's apron as my pattern and it was a very quick and easy project!

Next we have my mom's gift. She loved my stocking hanging solution from last year so much that she asked me to make her one. Except hers needed 15 stockings and room for growth!! I wanted hers to be somewhat different from mine so that she'd be extra surprised and excited, this is what Scott and I came up with.


She loved it and I can't wait to see it hanging next year!

Then we have my dad's gift....it was the hardest!! Scott was looking online at building projects as possible gifts and came across a fishing pole holder that he knew my dad would love and could put to use. I convinced him to just buy the plans rather than wing it so after waiting 2 weeks for them to come we only had about a week to build it! 

I didn't take any photos of the process, there was just too much going on the week before Christmas! Scott did the building and I did the painting.


Awesome, right?! Don't ask me how Scott cut out those tiny fish fins and all that, all I know is he still has 10 fingers ;)

I always try to put a lot of thought and effort into the gifts I give people but I have to say, giving hand made gifts was extra fun :)


December 7, 2012

Bedroom Set Makeover

Hey guys :) Remember when I made over the black hutch this fall? Well as soon as i finished I got started on an entire bedroom set for the same client. They wanted the same finish as the hutch had gotten for this furniture.

It only took a few weeks to complete but I just got the chance to come over to their house the other week and see it all set up in their room. I forgot my camera (I swear my brain has stopped working) so my client took the pictures for me, bless her heart :) 

Here's the bed and nightstands...


And here's the dresser...


I painted them with my new toy, the Wagner Power Painter.


Here's the befores...


I started by taping up 2 big plastic drop clothes on the inside of my garage door.


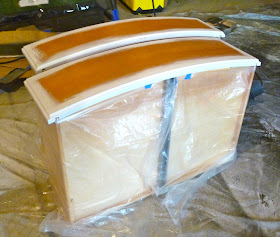
After sanding everything I sprayed all of the furniture with primer. To do the drawers I used a brush around the edges, wrapped them with more plastic tarp and then stood them on a crate to spray the fronts.


Then I went through these steps again with the black paint. Using the paint sprayer really sped up the whole process except when I got to the head board and foot board and had to wait for one side to dry completely before turning them around and spraying the other sides! 

I used an eggshell paint finish and then sprayed everything with a polycrylic spray in a gloss finish. I think it turned out great!


December 3, 2012

Daydreaming


Finishing a fun project like our new chalkboard wall in the kitchen has a way of energizing me. It gets the gears in my head moving and I find myself standing in the middle of my kitchen staring at the cabinets envisioning things...


Wouldn't it look nice if I took off those cabinet doors and painted the insides of the cabinets?? I mean that cabinet of the far right doesn't even open ever since we put in the new hood vent...


Of course then I'd have to make sure everything in all of those cabinets was pretty and find a new place for all of my kids plastic dish ware....

And wouldn't it look nice if Scott built new cabinet doors for all of these bottom cabinets and I painted them boxwood green from Miss Mustard Seed's Milk Paint line? I mean that cabinet on the far left doesn't even have a door! 


I spent 15 minutes standing in my kitchen the other day, just staring...thinking about wether I have enough pretty looking dishes to fill those cabinets if they were open, where I'd put the coffee, would I need to buy new shelving or could I paint what I have? How hard is it to paint the insides of all those cabinets?

There's a million things I should have been doing during those 15 minutes but I won't worry about that. Daydreaming is one of my favorite past times :)


November 16, 2012

Fruit and Veggie Hanging Wall Baskets

Hey there! I wanted to share today about the baskets hanging on my new chalkboard wall. 


As I mentioned yesterday I was inspired by these awesome baskets I saw on Pinterest eons ago.


These are still for sale I think if you go through the source under the picture. But I wasn't thrilled about the price at $43 each.

So I searched some local stores until I found something that might work. 


These were purchased at Crate & Barrel for $12.95 each. Plus these smaller baskets aren't as deep as the ones I originally wanted which is good since they are behind my kitchen side door. So for $40 (including tax) I bought 3 of them. 

Another feature I like is that they are hanging from hooks so I can take them on and off the wall whenever I like to use them! 


I bought these 1 inch Brass Cup Hooks from Home Depot in the hardware isle. This is them after I quick sprayed them with some metallic black spray paint I already had in the house.


They don't screw very deep into the wall and these baskets are holding some pretty heavy items so I also bought some anchors.


After marking where I wanted the hooks to go I drilled holes according to the anchor's packaging with the correct size drill bit. Then I just pounded the anchor into the wall with a rubber mallet (a hammer would work just fine) and screwed the hooks in by hand! You could see the yellow anchors so I quick touched them up with some chalkboard paint and went over the hooks with it too. I wanted the hooks to just blend in with the wall since they didn't come in a silver like the baskets and I didn't have that color spray paint in the house! ;)

I love having these baskets on the wall! I don't have a lot of counter or pantry space so any extra storage is always welcome!! 

To finish off the space I just hung a little hook on the wall and hung my apron from it, I think it looks so cute now!! I can't believe I left this space empty for so long!


I also promised yesterday to share how I wrote so nicely on the wall even though I have awful  handwriting. I just happened to see this trick on Pinterest after having just finished painting my chalkboard wall, perfect timing!!


CLICK HERE to be taken to the website and get step by step directions. So easy and I couldn't believe it actually worked for someone like me. My handwriting is seriously that bad people. 

November 15, 2012

Chalkboard Wall

Hey guys! I'm so excited to share the project I started 2 weeks ago in my kitchen!! It was just one of those things where I thought of it on a Friday night and by Saturday morning was right in the middle of it!

I now have a chalkboard wall!


I have always wanted to frame out a chalkboard area in that section of the half wall to the right of the kitchen table but just never made it happen. 


Well 2 weeks ago after finishing my new book, Inspired You, I stood in my kitchen feeling very inspired to do something to my home. I spend so much time on furniture that sometimes I just want to be able to work on my home and my  things, you know?

Well after debating making a chalkboard for the hundredth time  and wondering what I'd then do with my grandma's cigar table it hit me. Make the whole wall a chalkboard!! I was sooo excited about this idea when I realized I was going to have to get Scott on board. I cautiously made remarks all night hinting that I had an idea I needed him to let me go with and when I finally came clean he calmly (a little too calmly actually) told me he trusted me. When he got home from work the next morning I had already taped, trimmed out, and painted the whole wall with 1 coat!! I couldn't help myself once I realized I had all the supplies I needed right here in the house!! 

I made sweet little bunting to hang on each end of the wall...


and I wrote out the fruits of the Spirit below the pass through to the living room.


Scott suggested I write "All that brings joy" above the pass through which at first I thought sounded self obsessed or something but after a moment I realized how perfect it was. It's not written there as an advertisement for my blog, but as a reminder of what my blog is all about. Enjoying all of the things God has brought into my life that bring me so much joy.


My favorite area is in the far corner by the kitchen side door. 


These baskets are something I had wanted to do here ever since spying this on Pinterest:


I will share with you tomorrow exactly how I did it and for cheap!!! :)


I'll also share how I wrote everything on the wall so beautifully even though I have the worst handwriting in the world. And no, I didn't hire my sister in law to do it for me, although that thought did cross my mind...

Here's a shot looking towards the other side of the kitchen.


I hope these pictures do it justice, it's so cute in person and I just love walking in my back door now!! I also love the fact that when you walk in the front door everything still looks the exact same as before, you have no idea what fun is on the other side of that wall!! ;)


November 12, 2012

Touch-Ups

Hey there! Hope your Monday has been as wonderfully productive as mine has been! I may be one of the few people out there who loves Mondays. It may have to do with the fact that I don't have a physical work place that I have to go to. But it mostly has to do with the fact that I get to take back control of the house!! Cleaning and grocery shopping and meal planning OH MY! 

So while I was feeling ultra productive today I decided the scuff marks all over the stairs were going to get taken care of! We repainted everything in this area of the house 2 years ago and I touched up the stairs and had them looking brand new. Then I vacuumed them telling myself I would be super careful....but over time I got less and less careful and those beautiful stairs were looking awful.


So I broke out the paint that we used on pretty much every white surface in our home :) I only painted over the scuffed areas and it blended in just fine. Just 10 minutes per coat and now my stairs are back to looking beautiful again! By the way, I will only be using the hand broom and dustpan on these bad boys from now on!


Ugh. Sorry, lighting was an issue today. And probably will be all winter:( 

I'm really hoping to do something fun with the stairs this year in my Christmas decorating like this...


Or this....


So getting them looking fresh and clean now will give me a little head start come the day after Thanksgiving!!


November 6, 2012

The Lost Key


See that key? It's cute isn't it? So cute and small and.....easily lost.....

Let me start by telling you about last spring. My grandma wasn't doing well and she had just been told by the doctors that this was the end. I went to visit her that night to sit with her and watch some Wheel of Fortune with her probably for the last time. (oh dear, I didn't mean to get emotional but I'm there) While we sat she asked to see pictures of what furniture I was working on. She was so sweet and supportive and excited for me. She then told me that she wanted me to have her antique secretary desk. She'd always wanted to have it refinished and never got around to it so now she told me to paint it how I like and sell it. I thanked her profusely but told her I was NOT selling it. I promised her I would paint it and give it to my little sister. She and her husband were closing on a new house very soon. That was the last conversation I had with my grandma.

As you can imagine this secretary desk now has a very special place in my heart. 

I've been waiting and waiting to get it done for my sister while we waited for the house to close and then to pick out a color and then for my life to settle down a bit. And thank goodness the time has finally come! I bought the paint last week and excitedly brought the desk into my office to get started. I looked on my desk for the key....I looked on my bulletin board for the key.....I looked in every drawer in my office for the key....

It was lost.

I thought, "I will find it. I'm sure I put it somewhere very safe..." Days went by, no key. I was getting nervous. Very nervous. And I didn't dare tell my little sis who knew I had already gotten the paint but mysteriously wasn't telling her how it was going!! 

We skyped for her birthday last night. I almost told her a number of times...but kept biting my tongue.

This morning while drinking some milk at the counter I looked up and saw my kitchen cabinet. The one with the bowl in it where I put my extra car keys and house keys. I thought, "Maybe?!?" Sure enough. It was there. Such a safe place. Such a Duh! place. Relief washed over me, then excitement that I could finally start on my grandma's desk :)

And no, I never told my sister. So I expect to get a call from her about 1o minutes after I post this ;)


I promise to keep it right here from now on, Sarah!!!