I got a phone call from Mindy over at Mindy's Classic Finds a couple of weeks ago letting me know she had some furniture in need of a makeover. One of the pieces was a cute little table that had endless possibilities.
Here it is in all it's finished glory!
You want to see how it started out??
I of course had already started sanding the top smooth. I guess I just get a little too excited every time I meet a new piece of furniture ;)
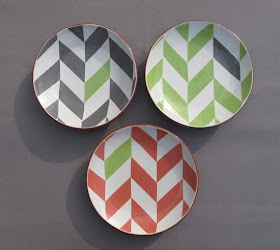
The top of the table used to have a tray that sat inside which left a perfect spot to do something special. I wanted to try a herringbone pattern but didn't want it to be boring so I went to Pinterest for some inspiration and found this:
Aren't they awesome? They're originally from an Etsy shop, but either the shop doesn't exist anymore or they're not selling them anymore.
So I got to work painting the table Pure White by Annie Sloan and making a stencil for my pattern. I grabbed a big piece of my kids' craft paper, a pencil and a ruler. I started by marking how long I needed it to be (the length of the table top). Then I marked 2 " & 4" up from the bottom edge of the paper on each end. Then I took a yard stick and made straight lines across. I then marked every 2" across the paper and took a ruler to connect the dots making a big zig zag pattern. Does that make any sense?! Here's a picture of it:
I cut out the big zig zag and placed it on the table about a 1/4" from the top because the table depth wasn't divisible by 4". It was off by half an inch, so I wanted to have an extra 1/4" at each end, understand? No? I'm even confusing myself over here...basically I didn't want to have a nice full zig zag going across the top of the table but then the last zig zag being cut off awkwardly. So I guess I centered it. :)
I traced the zig zag with a pencil and then moved it down and traced again and again and again. Then I took my ruler and made straight lines down the middle of each zig and each zag :)
I painted every other rectangle with 2 coats of French Linen by Annie Sloan. I painted them freehand with a small children's water painting brush from Hobby Lobby. It didn't leave perfect lines but that was okay with me.
Then I distressed. I went to town on all of the legs and edges and every rectangle done in French Linen. I was nervous about that part since they had taken me so long to paint, but I was loving the way it was looking! I then taped off one of the rectangles and painted it with my leftover aqua mixture by Annie Sloan. I wanted this rectangle to be bright and eye catching and have perfectly straight edges. When it was all done I waxed the whole thing with clear wax.
I love it. I adore it. It's one of my favorite things I've ever done....and it looks adorable in my basement. But it's going back to Mindy's store. :) That's okay, I had so much fun painting it that I'd love to do it again sometime.
Here's some picture overload of all the details!


